Monday, October 31, 2011

October 25-27

Tasks for this week:
EMB Agar
Mannitol Salt Agar
MacConkey

RESULTS: 
EMB: Dark purple, green metallic sheen
Mannitol Salt Agar: Mannitol non-fermenter
MacConkey Agar: Lactose-fermenter

EMB
Purpose:
To isolate and differentiate gram-negative enteric bacilli

Materials:
EMB agar plate
Unknown "K" bacteria

Procedure:
Label EMB plate correctly. (See previous blogs)
Use aseptice technique to inoculate the EMB agar plate as a streak plate.
Incubate the inoculated plate upside-sown for 48 hours at 37 degrees C.
See results


Notice the green metallic sheen.
MANNITOL SALT AGAR

Purpose:
To isolate bacteria base don their salt tolerance and differentiate among these isolates for mannitol fermentation.


Materials:
Mannitol salt agar plateUnknown "K" bacteria


Procedure:
Label Mannitol plate correctly. (See previous blogs)
Use aseptice technique to inoculate the Mannitol agar plate as a streak plate.
Incubate the inoculated plate upside-sown for 48 hours at 37 degrees C.

Look at Results
Mannitol non-fermenter. Note, my bacteria is on the right side and it did not grow.


MacConkey Agar

Purpose:
To detect and differentiate among gram-negative enteric bacilli, based on their ability to grow on the medium and to ferment lactose. 


Materials:
MacConkey agar plate
Unknown "K" bacteria


Procedure:
Label MacConkey plate correctly. (See previous blogs)
Use aseptice technique to inoculate the MacConkey agar plate as a streak plate.
Incubate the inoculated plate upside-sown for 48 hours at 37 degrees C.
See results
Notice the bubbles coming from the bacteria. This occurred after applying Hydrogen Peroxide to the bacteria. This again proves that my bacteria is filtrated.
Lactose-fermenter

Thursday, October 20, 2011

October 18 & 20

This week I completed various tests
  • Gelatin Hydrolysis test
  • Fermentation
  • Tripple Sugar Iron Agar test (TSIA)
  • Methyl Red Test
  • Litmus Milk Reaction
 RESULTS:  
  • Gelatin= negative 
  • Fermentation= Sugar and Acid were the end products. Gas was produced in both the glucose and lactose vials that were in the test tubes. My bacteria mostly used glucose and lactose. Not the sucrose, although there was some bacterial growth. 
  • TSIA = I observed a yellow slant/ yellow butt which = acid slant/ acid butt with gas. There was also a break in the agar. Which means that glucose and lactose &/ or sucrose were fermented.
  •  Methyl Red test = Positive test  for mixed-acid fermentation pathway. (my broth turned red)
  • VP Test= negative. My broth didn't change colors.
  • Litmus Milk reaction= results still unknown. Will not know until 7 days pass.
 Gelatin
Purpose:
To determine the ability of bacteria to hydrolyze gelatin. 
 
Materials needed:
Nutrient gelatin deep tube
unknown bacteria in slant

Procedure:
I labeled the test tube properly and used aseptic technique to inoculate the gelatin by stabbing the gelatin with an inoculating needle with bacteria from my unknown.

I stored the gelatin in the incubator at 37 degrees C for 48 hours then I placed it in the fridge for 15minutes. After removing the gelatin from the fridge I checked it for liquidation and the test came back negative because there was no liquidation.

Gelatin preinoculation


Gelatin after incubation and refrigeration. Note that liquidation did NOT occur. 


Fermentation of Carbohydrates

Purpose:
To determine the ability of some bacteria to ferment a particular carbohydrate. 


Materials:
3 tubes of phenol red- sugar broth with Durham tube
                                   The three sugars used were sucrose, lactose, and glucose. 
Unknown bacteria slant


Procedure:
Labeled the test tubes properly 
Used aseptic technique to inoculate each sugar broth with a loop full of unknown bacteria. 
I incubated the now contaminated broths in 37 degrees C for 48 hours although the instructions said for 24 hours. 
After incubation I checked each test tube for acid production or acid and gas production. 
My Lactose was very pale yellow. The glucose was a brighter shade of yellow and the sucrose stayed red. As seen in the picture below.


Lactose before being contaminated

Glucose before being contaminated

sucrose before being contaminated

Results. From Left to right: Lactose, Sucrose, Glucose.  
                                            Note the gas bubbles in both the lactose and glucose samples. 


 Triple Sugar Iron Agar Test (TSIA)
Purpose:
To differentiate among the gram-negative enteric bacilli as to their ability to ferment glucose, lactose, and sucrose and to produce H2S. 
 
Materials needed:
Triple sugar iron agar slant tube
unknown bacteria in slant
Inoculating needle with a straight wire

Procedure:
I labeled the TSI tube.
Used aseptic technique to remove a small amount of my unknown bacteria with an inoculating needle. I stabbed the bacteria into the TSI agar butt to about three-quarters deep. As I withdrew the needle I streaked in a zigzag pattern along the slant surface.
I incubated the tube at 37 degrees C for 24 hours and noted the changes that occurred.
My tube turned from red to completely yellow. Which means my slant is acidic and the butt had gas produced.
The Agar slant before being inoculated
After 24 hour incubation. Note the color change of the agar from red to yellow.

A better view of the color change that occurred


Methyl Red Test/ VP Test

Purpose:
To determine the ability of some bacteria to ferment glucose via mixed-acid fermentation.  


Materials:
Methyl red (MR-VP) broth tube
Unknown bacteria culture in slant
Barrett's reagent A
Barrett's reagent B
Disposable gloves
Methyl red in a dropper bottle 


Procedure:
Labeled the test tubes properly 
Used aseptic technique to inoculate the MR-VP broth with a loopful of my unknown bacteria. 
After incubating the broth at 37 degrees C for 48 hours I separated the broth into a second test tube (making sure there were equal amounts of contaminated broth in each tube.)
In the first tube I added 5 drops of methyl red. Gently swirled the tube to mix the broth culture and pH indicator.
After swirling I noted that a red color was formed. This redness yields a positive test for the mixed-acid fermentation pathway.


Broth after 48 hour incubation but before splitting it into two test tubes.

MR-VP positive test results
In the second tube I performed the VP test. 
I first put on the gloves before handling the Barrett's reagents.
VP negative test

I added 15 drops of Barrett's reagent A and 5 drops Barrett's reagent B.
After swirling the broth for a few minutes there was no color change which results in a negative test. 


Litmus Milk Reaction
Purpose:
To differentiate among bacteria as to their ability to utilize lactose, protein, and litmus in litmus milk. 
 
Materials needed:
Litmus milk tube
unknown bacteria in slant

Procedure:
I labeled the test tube properly and used aseptic technique to inoculate the litmus milk with a loopful of my unknown bacteria. 
I inoculated the tube at 37 degrees C for 48 hours. examined the tube, and placed it back in the incubator for another 4 days. 


Preinoculation

After 48 hours in the incubator


Tuesday, October 18, 2011

Disclaimer


All content provided on this blog is representation of the blog owner and not Franciscan University of Steubenville. The information on this site is purely used for education purpose. The owner of this blog makes no representations as to the accuracy or completeness of any information on this site or found by following any link on this site. The owner will not be liable for any errors or omissions in this information nor for the availability of this information. The owner will not be liable for any losses, injuries, or damages from the display or use of this information.
Privacy
The owner of this blog does not share personal information with third-parties nor does the owner store information is collected about your visit for use other than to analyze content performance through the use of cookies, which you can turn off at anytime by modifying your Internet browser’s settings. The owner is not responsible for the republishing of the content found on this blog on other Web sites or media without permission.
Blog Comments
The owner of this blog reserves the right to edit or delete any comments submitted to this blog without notice due to;
1. Comments deemed to be spam or questionable spam
2. Comments including profanity
3. Comments containing language or concepts that could be deemed offensive
4. Comments that attack a person individually
This policy is subject to change at anytime.

Monday, October 17, 2011

October 6

ACID-FAST STAIN

Purpose: To distinguish between acid-fast bacteria and non-acid-fast bacteria. 
 The difference in lipid content of the bacteria's cell wall is what makes the bacteria acid-fast or not

Materials:
1 slide with a fixed smear of unknown sample
Ziehl-Neelsen stain
Acid-alcohol
methylene blue
Hot plate
100 mL beaker with deionized water
strip of filter paper that will cover slide
was bottle with distilled water
bibulous paper
forceps of some kind


Procedure:
1. Put the 100 mL beaker with deionized water on the hot plate and bring to a boil.
2. Place the slide so that it is resting on the top of the beaker (fixed smear side facing up).
3. Put filter paper on the slide and saturate the paper with Ziehl-Neelsen carbolfuchsin.
4. Stain for 3-5 minutes. Continue to add stain as it evaporates; do not allow the stain to dry.
5. Using the forceps, remove the slide from the heat. Remove the paper and throw it away. Allow the slide to cool.
6. Rinse the slide with distilled water to remove any excess stain.
7. Holding the slide at a 45 degree angle decolorize with acid-alcohol. Add the alcohol drop by drop until the color stops running.
8. Immediately rinse the slide off with distilled water.
9. cover the smear with methylene blue for 2 minutes.
10. Rinse the slide with distilled water to remove any excess methylene blue.
11. Blot the water off the slide with bibulous paper.
12. Examine slide under the microscope with oil immersion lens.


Non-Acid-Fast stain
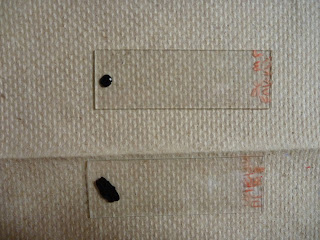
Conclusion: I had a non-acid-fast stain. You can tell because all of my bacteria were stained from the methylene blue and not from the Ziehl-Neelsen.

ENDOSPORE STAIN

Purpose:
To view bacterial endospores under the microscope and to observe the location of an endospore in a sporulating cell.

Materials:
 Side with fixed smear on unknown bacteria
 Malachite green stain
Safranin stain
 staining rack over a sink
Steaming deionized water in a 100 mL beaker
Hot plate
piece of filter paper
distilled water
bilbulous paper
Forceps

Procedure:
1. Fix bacteria to slide
2. Place the slide on a beaker with boiling water.
3. Place filter paper on the slide and saturate the paper with malachite green
4. Stain for 5-6 minutes after the malachite green begins to steam. Add stain as it evaporates. Do not allow the stain to dry.
5. Use forceps to remove the slide from the heat. Remove the paper and throw it away.
6. Allow the slide to cool.
7. Rinse the slide with distilled water for about 30 seconds to remove any excess malachite green stain.
8. Cover the smear with safranin for 60-90 seconds.
9. Rinse the slide with distilled water to remove excess safranin.
10. Blot water off the slide with bibulous paper.
11. Using the oil immersion lens to look at bacteria under microscope.


Non-Endospore Stain

Conclusion: My bacteria do not have endospores. If it did have endospores, then the nucleus' would have been stained green.

October 4

Lab was quick and easy today. My task was to inoculate broth with my environmental sample.

September 29

Our task for today's lab was to prepare a capsule stain. In order to prepare a capsule stain we had to first prepare a negative stain.
(* all proper sterilization procedures were practiced throughout this lab*)


NEGATIVE STAIN
Materials used for the Negative stain:

1. 2 clean microscope slides that will be used for the staining process.
2. 2 clean microscope slides that will be used to spread the Nigrosin.
3. Nigrosin stain.
4. Staining rack over the sink.
5. Disinfectant solution.


The steps that were taken for both the environmental sample slide and for the unknown sample:

1. We placed a small drop of Nigrosin near one end of the slide.


2. With a loop, we transferred a small amount of bacteria from an agar plate into the Nigrosin drop and mixed the bacteria and Nigrosin together.


3. We touched (and slid) the short edge of another clean slide to the slide with the contaminated Nigrosin at a 45 degree angle.


4. After the contaminated Nigrosin drop was spread along the edge of the spreader slide, we quickly pulled the slide to spread out the drop.


5. We allowed the smear to air dry completely.


6. We repeat this process for the second slide


CAPSULE STAIN

Materials used for the capsule stain:

1. negative stained slides
2. safranin or crystal violet
3. distilled water


This stain is used to detect whether or not either of our environmental bacteria or unknown bacteria have capsules.

1. We took our prepared negative stains and, after allowing them to completely dry, stained our environmental stain with safranin and our unknown with crystal violet.

2. After allowing the stain to set in for about a minute each, we gently washed off the excess stain with distilled water.

3. Blot the water from the slide with bibulous paper.

4. We examined the smears under the microscope using the oil immersion lens.

5.We washed the slides in disinfectant solution


Above Results: Our unknown sample = bacilli shaped, no capsule


Above Results:
Environmental sample= Rod-shaped, no capsule

September 27

Today we prepared a Gram stain of both our environmental sample and of our unknown sample.

The materials we used to prepare a Gram stain included:

1. Two slides: one with a fixed smear of our unknown sample and one with a fixed smear of our environmental sample.
2. Safranin stain
3. Crystal Violet stain
4. 95% Ethanol solution.
5. Gram's Iodine
6. Distilled water

(NOTE: Look to our previous postings for demonstrations as to how to fix bacteria to a slide.)


1.After fixing the bacteria to the slide, we covered the smear with crystal violet and let it sit for about 20 seconds.


2. We rinsed the slide with water to remove excess crystal violet, and covered the smear with Gram's iodine for 1 minute. We then rinsed the slide with distilled water to remove any excess iodine solution.


3. Then, while holding the slide at a 45 degree angle, we de-colorized the slide with an 95% ethanol solution, applying the solution drop by drop until colored solution stopped running down the slide. After decolorizing the slide, we immediately rinsed the slide with distilled water to remove the decolorizing agent.


4. We covered the smear with Safranin stain for about 1 minute and rinsed the slide off with distilled water to remove any excess Safranin. Bilbulous paper was used to blot off water from the slide.


5. Lastly, we examined the stained smear under the microscope using the oil immersion lens.

GET PIC OF GRAM NEG STAIN!!!!!!!!!


RESULTS: We concluded that our unknown sample was a Gram negative because the bacteria was stained Red.